
4 Must-Know Procreate Tools for Character Artists
- Apr 28
- 2 min read
Updated: Apr 29
Procreate is an awesome tool for character art, but with so many features, it’s easy to feel overwhelmed. If you’re just starting out, these 4 tools will help you draw better characters!
1. Custom Brushes for Smoother Line Art
Procreate’s default brushes are great! But custom brushes might be just what you're looking for. A good sketching brush (made by a character artist) can make it easier to create smooth, confident lines. I love my custom-made Willow Charcoal StreamLine brush. It's my go-to sketching brush for characters!

✍️ Want to see if you like it? Get the sketching brush for free HERE.
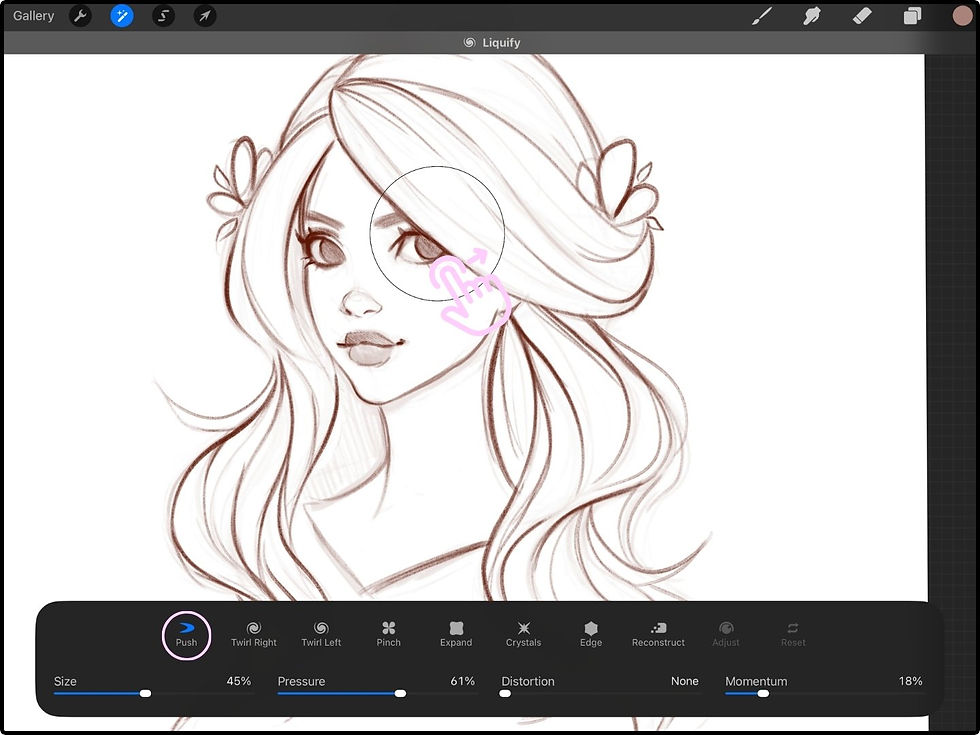
2. Liquify Tool for Easy Adjustments
Have you ever been working on a drawing and wished you could just move the eye a liiiittle bit? Or the mouth a liiiittle bit one way or the other, without erasing and redrawing everything?
The Liquify tool can help you make these small tweaks to your line art!

Go to Adjustments > Liquify and use the Push option to gently nudge things in the right direction. This is perfect for making subtle changes without having to redraw.
3. Hue, Saturation, Brightness for Quick Color Changes
Want to test different hair or eye colors without repainting? It's easy in Procreate!
Here's how to play with colors and experiment:
Select a layer with something you've colored already. In this example, I'm tapping to select the “Hair” layer.

Go to Adjustments > Hue, Saturation, Brightness.

Push around the sliders to explore different colors! (This is so fun.)

This is a great way to experiment with color and see who your character becomes. Because color can change your character's story and overall feeling of your piece so much.

4. Clipping Masks for Easy Shading
Clipping Masks are a game-changer for adding shadows and highlights without going outside the lines.
How to use clipping masks:
Open the Layers panel and tap the layer you want to add some lighting to. Here, I want to add some simple shadows to the skin, so I'm selecting the Skin layer.

Now add a layer on top by tapping the + symbol in the upper right.

This will add a new layer right on top of the Skin layer. Tap that new layer and select Clipping Mask.

Now you can grab a darker color and add some simple shadow shapes! And the cool thing is- any marks you put down will only affect (clip onto) the existing shape you already painted on the Skin layer. (So no need to worry about coloring outside the lines!)

Try these 4 tools on your next character piece. I think you'll like them and find that they become a regular part of your character art workflow. :)
Want a Shortcut to Better Character Art?

This starter kit was made to help you simplify your process and start sketching characters with confidence! You’ll get essential tools, references, brushes, and step-by-step guidance to make drawing stylized characters in Procreate simple and fun. :) For FREE!
